Installation guide for installing Apache Solr 4+ with Apache Tomcat 7 on Winows Server 2008 R2
Step by step installation guide for installing Apache Solr 4+ with Apache Tomcat 7 on Winows Server 2008 R2.
Applicable to:
Note: This installation guide assumes that you’re installing Apache Solr on your Windows Server 2008 R2 or Dedicated Server. For installing Apache Solr on any other Server or Linux OS, try searching Google for help.
Apache Solr runs on Java 6 or greater. When using Java 7, be sure to install at least Update 1! With all Java versions it is strongly recommended to not use experimental -XX JVM options. It is also recommended to always use the latest update version of your Java VM, because bugs may affect Solr. An overview of known JVM bugs can be found on http://wiki.apache.org/lucene-java/SunJavaBugs.
For more details refer: http://lucene.apache.org/solr/4_2_0/SYSTEM_REQUIREMENTS.html
Step 2: Installing Java Servlet Container like Tomcat 7
You can use any Java Servlet Container you are familiar with. If your server already has one of the Java Servlet Container, then use it. You can find more information on the same here: http://wiki.apache.org/solr/SolrInstall
For illustration purposes we’ll be installing Tomcat 7 on Windows Server 2008 R2.
Download Tomcat 7 from Apache Solr Download Page. We’ll be using Apache Tomcat 7 32-bit/64-bit Windows Service Installer.
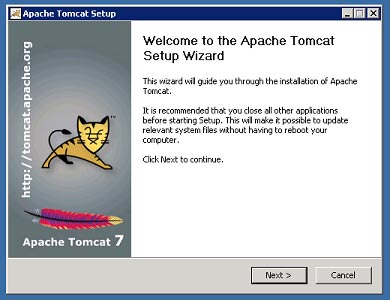
Once downloaded, execute the downloaded file and follow the Apache Tomcat Setup Wizard.
 Proceed further with clicking on Next.
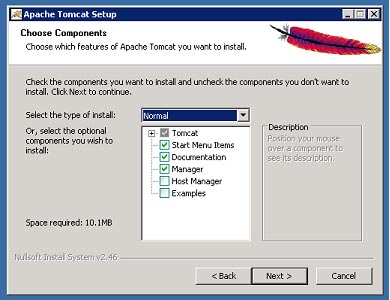
 Select the components that you wish to install and click on Next. We selected to install with default options.
 Provide configuration options you wish to use and then click Next. We selected to install with default options. Except the HTTP/1.1 Connector Port, which was changed to 8983 as we do not want to mess with some other web server using 8080 already.
The next step is License Agreement, review the license agreement and then proceed further by clicking on “I Agree”.
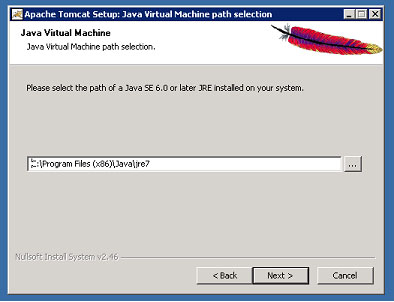
 Provide the path of the JRE installed on your Server and click Next.
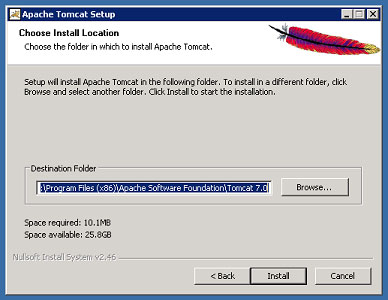
 Choose the installation folder location where you wish to install Apache Tomcat and click Install.
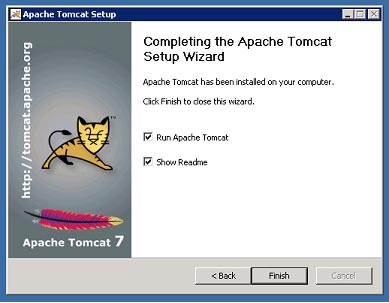
 Click Finish to complete the installation.
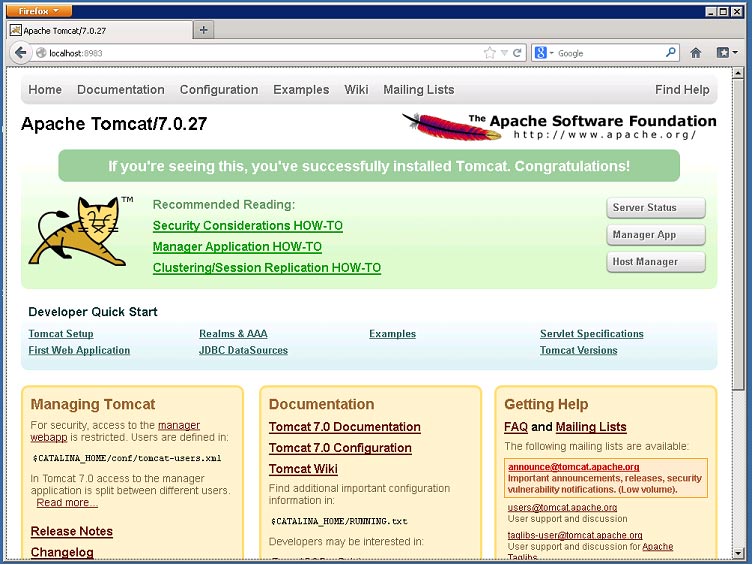
Now, try accessing, Apache Tomcat at http://<hostname>:<port>/
For example, we installed it on Port 8983 so URL we would be accessing is http://localhost:8983/
If it is installed correctly, you’ll see Apache Tomcat Start Page.
 If you’re not able to access this page, something might be wrong with the installation. Look at the Apache Tomcat 7 Windows Service How to page for help.
You can find more help at following URLs:
You can download latest version of Apache Solr from http://lucene.apache.org/solr/. We’re using Apache Solr 4.2 for this tutorial. Use compiled version, and not the Source for deployment. If you download Source, then you need to build Solr before you can use it.
Step 4: Deploy Solr war file to Tomcat Webapps folder
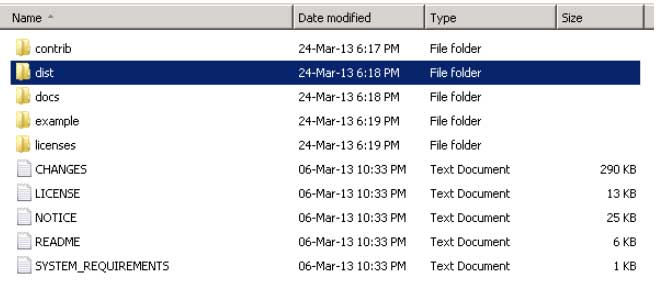
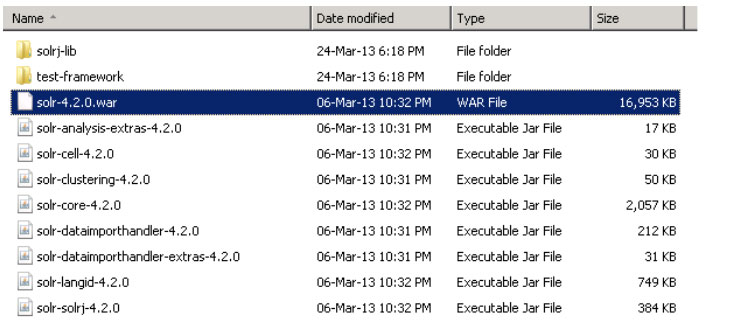
Extract the file you’ve downloaded and locate the “\dist” folder.
 Inside dist folder, find the “solr-4.2.0.war” file. This is basically the zipped file that contain all the necessary binary for the servlet container to run the web application.
 Rename the file to solr.war, because that will be the name of the URL to access Solr. You can rename it to any other name you wish. Make sure to remember it.
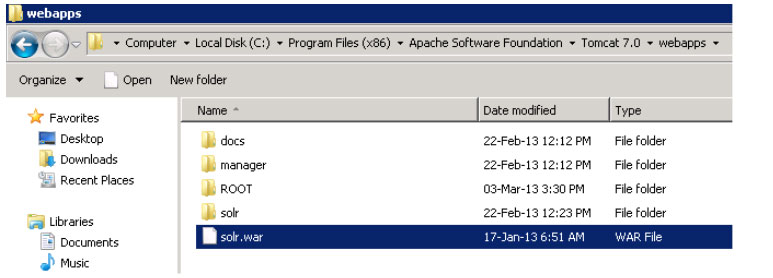
Move this file to the Tomcat’s “webapps” folder. This folder is located at the Tomcat Installation folder. If you’ve left it to default location, then it should be: “C:\Program Files (x86)\Apache Software Foundation\Tomcat 7.0”.
 If tomcat service is running, you will find that a solr directory is automatically created. If tomcat is not running, don’t bother it will be created next time tomcat starts.
There are some additional steps if you are using Solr 4.3 or above.
http://wiki.apache.org/solr/SolrLogging#Using_the_example_logging_setup_in_containers_other_than_Jetty
Step 5: Create Solr Home
Next, we need to create the Solr Home.
The Solr home is basically a folder where Tomcat will look for all the relevant Solr configurations, as well as where the actual index files will be stored.
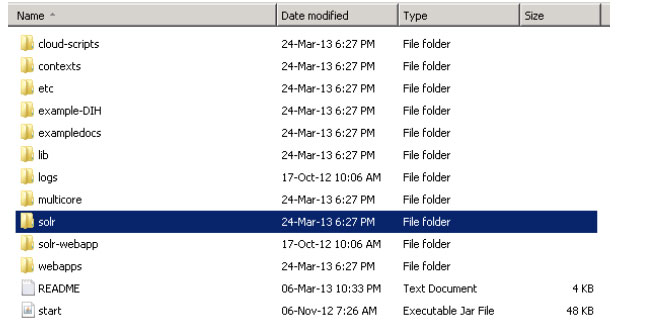
Go back to the unzipped Solr package, and locate the folder: “\example\solr“.
 Now create the new directory on your disk where you want to store Solr configuration files, Solr core & Solr index file.
For example: C:\solr.
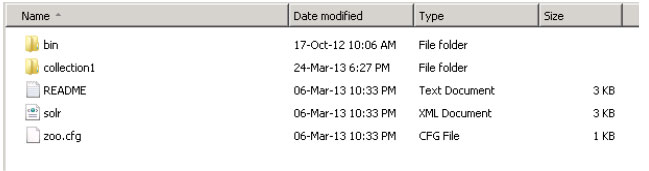
Copy the contents of “\example\solr” directory (should be a bin folder, collection folder, a solr.xml, zoo.cfg and a readme.txt) and place it under your root directory, under a folder named Solr (e.g. C:\Solr).

Note: You can place it anywhere on your hard drive, doesn’t have to be under the root, but wherever you place it, make sure to remember the full path.
Step 6: Configuring Tomcat to detect Solr
Next step is to tell Tomcat where the Solr Home folder is placed.
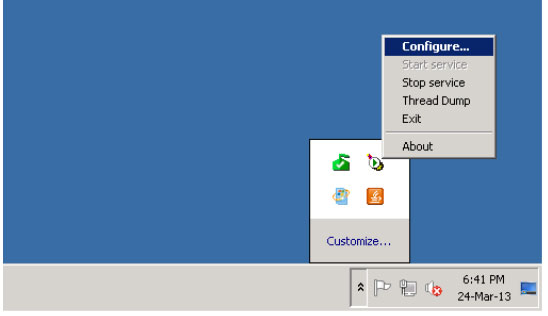
Open Tomcat’s configuration window. You can open it by clicking on Tomcat icon’s in system tray, and then click on Configure.
 Alternatively, you can open it by executing Tomcat7w.exe file located in bin folder of Tomcat 7.0 installation folder. E.g. C:\Program Files (x86)\Apache Software Foundation\Tomcat 7.0\bin\Tomcat7w.exe
Open Tomcat’s configuration window, and go to the Java tab.
Now, locate the Java Options text box, and enter this line at the end of all the other stuff that’s already there:
 Click on Apply to save changes.
Now, we need to start Apache Tomcat 7 automatically whenever Windows Server is restarted. By default, it is set to Manual startup. So, let’s change it to Automatic.
Go back to General tab. Change Startup Type to Automatic. And click on Apply to save changes.
 Once this is done, we need to restart Apache Tomcat 7.
On the same General tab, click on Stop button, and then on Start button to start Apache Tomcat again. Once done, click Ok to close the window.
Step 7: Testing Solr
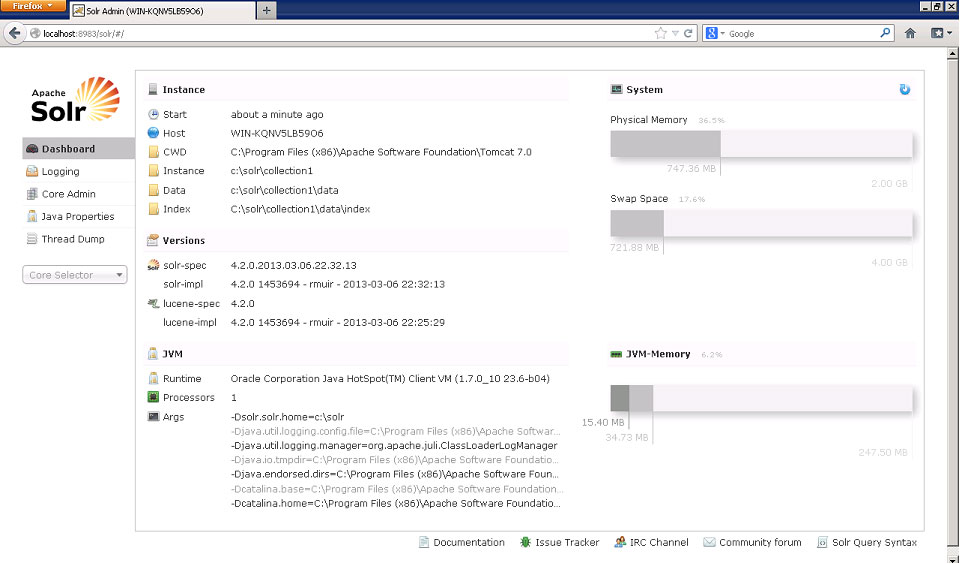
Try to accessing Solr at http://localhost:8983/solr (port number and app name may differ depending on the Tomcat installation & folder name you’ve configured). You should be able to access Solr Dashboard. The page will be similar to this:
 If you’re able to access this page, then you’ve installed Apache Solr correctly.
Useful References
Applicable to:
- nopAccelerate
- nopSolr Search
- nopSolr Navigation
- Self-hosted Solr Instance use case
Note: This installation guide assumes that you’re installing Apache Solr on your Windows Server 2008 R2 or Dedicated Server. For installing Apache Solr on any other Server or Linux OS, try searching Google for help.
System Requirements
- Java 6 or greater
Installation Steps
Step 1: If your server does not have latest version of Java installed, please install latest Java.Apache Solr runs on Java 6 or greater. When using Java 7, be sure to install at least Update 1! With all Java versions it is strongly recommended to not use experimental -XX JVM options. It is also recommended to always use the latest update version of your Java VM, because bugs may affect Solr. An overview of known JVM bugs can be found on http://wiki.apache.org/lucene-java/SunJavaBugs.
For more details refer: http://lucene.apache.org/solr/4_2_0/SYSTEM_REQUIREMENTS.html
Step 2: Installing Java Servlet Container like Tomcat 7
You can use any Java Servlet Container you are familiar with. If your server already has one of the Java Servlet Container, then use it. You can find more information on the same here: http://wiki.apache.org/solr/SolrInstall
Warning: This installation steps may not be complete and differ for each installation. Use it as a general guideline only. For more help, refer to Documentation of the Servlet Container you’re installing for your OS.
Download Tomcat 7 from Apache Solr Download Page. We’ll be using Apache Tomcat 7 32-bit/64-bit Windows Service Installer.
Once downloaded, execute the downloaded file and follow the Apache Tomcat Setup Wizard.
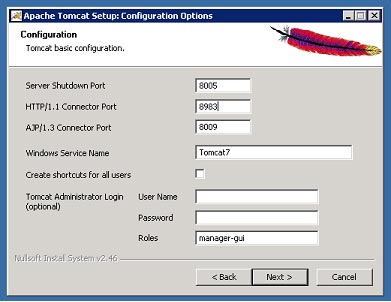
Hint: We also recommend you to provide Tomcat Administrator Login Credentials at this stage to make it secured. Make sure to note these details.
Now, try accessing, Apache Tomcat at http://<hostname>:<port>/
For example, we installed it on Port 8983 so URL we would be accessing is http://localhost:8983/
If it is installed correctly, you’ll see Apache Tomcat Start Page.
You can find more help at following URLs:
- http://tomcat.apache.org/findhelp.html
- http://wiki.apache.org/tomcat/FAQ
- http://stackoverflow.com/questions/tagged/tomcat
You can download latest version of Apache Solr from http://lucene.apache.org/solr/. We’re using Apache Solr 4.2 for this tutorial. Use compiled version, and not the Source for deployment. If you download Source, then you need to build Solr before you can use it.
Step 4: Deploy Solr war file to Tomcat Webapps folder
Extract the file you’ve downloaded and locate the “\dist” folder.
Move this file to the Tomcat’s “webapps” folder. This folder is located at the Tomcat Installation folder. If you’ve left it to default location, then it should be: “C:\Program Files (x86)\Apache Software Foundation\Tomcat 7.0”.
There are some additional steps if you are using Solr 4.3 or above.
- Copy the jars from solr/example/lib/ext into your container’s main lib directory. These jars will set up SLF4J and log4j.
- Exactly where this lib directory is highly variable. For a Debian or Ubuntu server using the Tomcat package available from the OS vendor, this is likely to be/usr/share/tomcat6/lib or /usr/share/tomcat7/lib.
- Copy the logging config from solr/example/resources/log4j.properties into a location on the classpath. Usually you can use the same location as the jar files above. Edit the configuration file for your preferred log destination.
- Optionally, if you did not place log4j.properties on the classpath, set java option -Dlog4j.configuration=file:///path/to/log4j.properties
http://wiki.apache.org/solr/SolrLogging#Using_the_example_logging_setup_in_containers_other_than_Jetty
Next, we need to create the Solr Home.
The Solr home is basically a folder where Tomcat will look for all the relevant Solr configurations, as well as where the actual index files will be stored.
Go back to the unzipped Solr package, and locate the folder: “\example\solr“.
For example: C:\solr.
Copy the contents of “\example\solr” directory (should be a bin folder, collection folder, a solr.xml, zoo.cfg and a readme.txt) and place it under your root directory, under a folder named Solr (e.g. C:\Solr).
Note: You can place it anywhere on your hard drive, doesn’t have to be under the root, but wherever you place it, make sure to remember the full path.
Next step is to tell Tomcat where the Solr Home folder is placed.
Open Tomcat’s configuration window. You can open it by clicking on Tomcat icon’s in system tray, and then click on Configure.
Open Tomcat’s configuration window, and go to the Java tab.
Now, locate the Java Options text box, and enter this line at the end of all the other stuff that’s already there:
-Dsolr.solr.home=c:\solr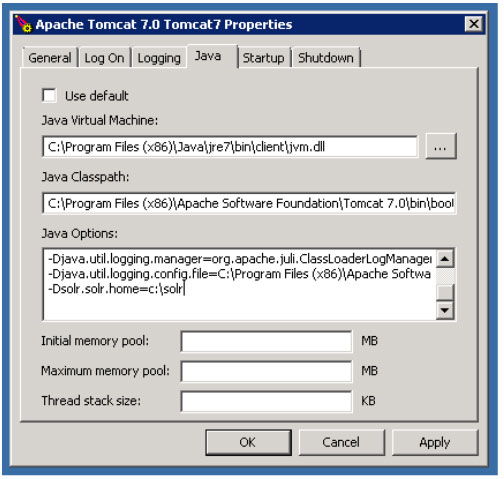
Now, we need to start Apache Tomcat 7 automatically whenever Windows Server is restarted. By default, it is set to Manual startup. So, let’s change it to Automatic.
Go back to General tab. Change Startup Type to Automatic. And click on Apply to save changes.
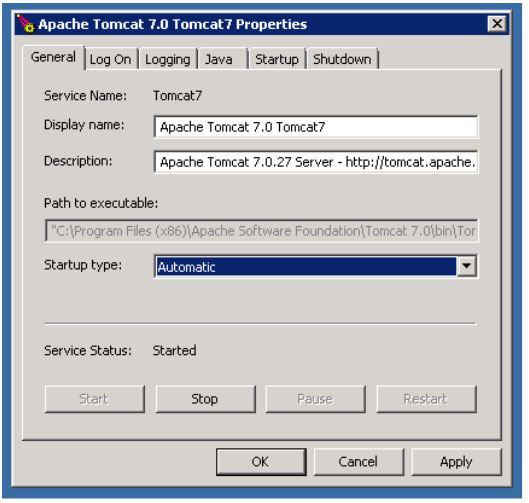
On the same General tab, click on Stop button, and then on Start button to start Apache Tomcat again. Once done, click Ok to close the window.
Step 7: Testing Solr
Try to accessing Solr at http://localhost:8983/solr (port number and app name may differ depending on the Tomcat installation & folder name you’ve configured). You should be able to access Solr Dashboard. The page will be similar to this:
Useful References
- http://wiki.apache.org/solr/SolrInstall
- http://lucene.apache.org/solr/4_2_0/SYSTEM_REQUIREMENTS.html
- http://wiki.apache.org/solr/SolrTomcat
- http://tomcat.apache.org/tomcat-7.0-doc/setup.html
Proceed with next step to configuring Apache Solr→
Need more help?
- Ask your question using
- Ask your question in the Forums (free with your plugin purchase)
- Go back to Documentation


Thank you so much for this nice information. Hope so many people will get aware of this and useful as well. And please keep update like this.
ReplyDeleteBig Data Services
Data Lake Services
Advanced Analytics Solutions
Full Stack Development Services